PowerShell basics for SharePoint 2010 (sp2010)
Posted
Friday, December 4, 2009 2:30 PM
by
CoreyRoth
I’m not expert in PowerShell, but I thought I would share a few basics I picked up at Ignite and various other places along the way when it comes to getting started with PowerShell. The easiest way to issue SharePoint commands with PowerShell is by running the SharePoint 2010 Management Shell located under Microsoft SharePoint 2010 Products in your Start Menu. However, it is good to understand what this shortcut actually does. PowerShell works by using the concepts of snapins. A snapin is simply a DLL installed with gacutil and installutil that implements a particular interface. This means you can write your own snapins to do whatever you want. All of the SharePoint commands are found in Microsoft.SharePoint.PowerShell.dll. So what this shortcut does, is it runs PowerShell with a script located at the path below.
C:\Program Files\Common Files\Microsoft Shared\Web Server Extensions\14\CONFIG\POWERSHELL\Registration\\sharepoint.ps1
This script simply uses the Add-PSSnappin command to load the SharePoint commands. If you started PowerShell by using some other link, you can also load the SharePoint comamnds by using this command. Note that the name is always specified without .DLL.
Add-PSSnapin Microsoft.SharePoint.PowerShell
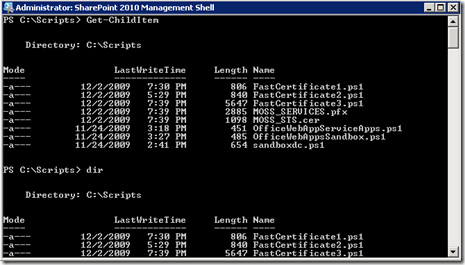
Working with PowerShell is in a lot of ways similar to working with a regular command prompt, it is just a lot more powerful. All of your familiar DOS commands will work because they have been aliased to child items. For example, Get-ChildItem is how you display the contents of the current folder in PowerShell, but you can also just type in dir to get the same results.

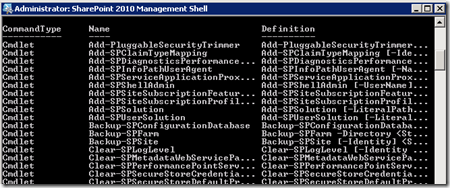
Knowing the name of the snappin lets us do a few things. First, we can get a list of all of the commands contained in it by using the Get-Command command with the –PSSnapin parameter. For example:
Get-Command –PSSnapin Microosft.SharePoint.PowerShell

Of course, there are 500+ SharePoint PowerShell commands returned so it makes that list difficult to deal with. So you can use some old school command prompt tricks to make the list more manageable. You can issue the command and hit the Pause key (lol). You can, use the | more technique to view one page at a time.
Get-Command –PSSnapin Microosft.SharePoint.PowerShell | more
You can also redirect the output to a text file like this.
Get-Command –PSSnapin Microosft.SharePoint.PowerShell > commands.txt
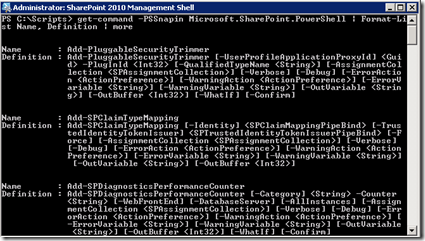
Then you can just open the file in notepad or the editor of your choice. If you want a more verbose description of how each command is used, you can use the Format-List command and pass it specific property names. Notice the properties I specified (Name, Definition) I just got from the table above.
Get-Command –PSSnapin Microosft.SharePoint.PowerShell | Format-List Name, Definition

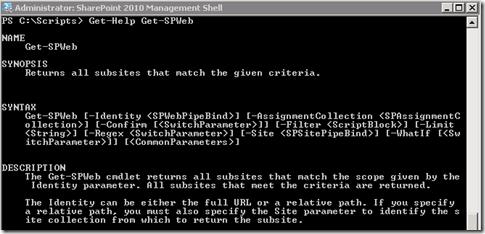
This is great, but then you might want to know more about the specific syntax of a command. For this you can use the Get-Help command. Just execute it followed by the name of the command you want information on. For example if I want to know about Get-SPWeb, I would issue.
Get-Help Get-SPWeb
It would return something that looks like this.

Once nice thing about PowerShell is that you can use tab to help you complete commands. For example you can type “Install-SP” and then press tab and it will cycle through the available commands. What is even better is that you can also use the tab key to add the parameters to the command. This is useful for when you can’t remember the exact parameter name.
Another thing I really like about PowerShell is that many times if you leave off a parameter, instead of just giving you an error, it will prompt you for the value. For example, if I want to create a new site collection, I use the New-SPSite command. I don’t remember the parameters, but it starts prompting me for things like the URL and owner name. And of course you can always use Ctrl+C to break out of the command if you change your mind.

There is a ton you can do with PowerShell and I won’t be able to cover it all in this one post. The power is that it allows you to string together complex commands together to get things done. If you want to build a script, you simply start by creating a .ps1 file. You can build this in notepad. There is also a PowerShell Integrated Scripting Environment (ISE) that will allow you to actually debug your scripts. One thing to be aware of is that to execute scripts, it requires an execution policy to be set. Chances are this is already set appropriately, but if its not, your script will not run. The three possible settings are restricted, unrestricted (prompt to run), and bypass. I think most people set this to bypass (although I am sure there are security considerations) with the following command.
Set-ExecutionPolicy bypass
There is so much to say about PowerShell. I hope this post serves as a good starting point to start exploring what you can do with it. I’ll be covering more advanced PowerShell topics in the future.